How to Keep Your RV Water System in Perfect Condition
Introduction – Why RV water system maintenance matters
Clean water is essential when you’re on the road. In an RV, your water system includes the fresh water tank, water lines, water pump, water heater, and any filters. If you skip maintenance, you risk bad taste, algae and biofilm growth, clogged filters, or even illness. For RVers in the US and Canada, regular maintenance and occasional sanitizing are simple steps that prevent big problems down the road.
Key facts to keep in mind:
- Health agencies advise draining, disinfecting, and flushing RV water systems at least once a year, and more often if the RV has been unused for months. CDC
- Private or non-municipal sources can be less reliable; roughly one in five private wells tested show contamination above health benchmarks, so treat unknown sources with extra caution. EPA+1
RV water system maintenance: what to inspect and how often
Create a simple schedule and stick to it. Here’s a practical checklist with recommended frequency:
| Item | Frequency | What to check |
|---|---|---|
| Visual check of hoses and fittings | Before every trip | Cracks, leaks, brittle hose, loose fittings |
| Freshwater tank sanitization | At least once per year – more often if stored or after contamination | Drain, bleach sanitize, flush (see step-by-step below). Many RV owners sanitize twice a year – spring and fall. CDC+1 |
| Water filters – sediment/inline | Replace every 3-6 months or per manufacturer | Reduced flow, taste/odor, visible discoloration |
| Water heater flush & anode check | Annually | Sediment, corrosion |
| Hose cleaning (drinking water hose) | After each campout if exposed to non-potable sources | Clean with bleach solution or replace if old |
| Winterize or de-winterize | Before and after winter storage | Remove water, use RV antifreeze when cold weather expected |
How to sanitize RV water system: step-by-step (sanitize RV water system)
Here is a clear, tested method commonly recommended by RV manufacturers and public health guidance:
Materials:
- Unscented household bleach (5.25 – 8.25% sodium hypochlorite) or a stabilized chlorine product labeled safe for potable water
- Fresh water source
- Funnel and clean bucket
- Gloves and safety glasses
- Optional: test strips for free chlorine
Procedure (example using household bleach):
- Determine your fresh water tank capacity – for example, 30, 50, 75, or 100 gallons.
- Calculate bleach amount – a widely used ratio is about 1/4 cup (2 oz) household bleach per 15 gallons of tank capacity. For a 60 gallon tank, that equals about 1 cup (8 oz). Many RV sources and service guides use this ratio as a baseline. KleenTank+1
- Mix: Add the measured bleach to the fresh water tank, then fill the tank with potable water.
- Circulate: Turn on the water pump and open all faucets (hot and cold) one at a time until you smell chlorine at each faucet – this ensures sanitizer reached all lines.
- Soak: Let the solution sit at least 4 hours – overnight is common. The CDC guidance on RV water systems recommends disinfecting and flushing and follows similar practical contact-times. CDC
- Flush: Drain the tank, then refill and flush until the chlorine smell is gone. You may need to refill and drain 1-2 times to remove chlorine taste.
- Optional test: Use chlorine test strips to confirm residuals are gone or within acceptable limits before drinking.
Notes:
- If you use stabilized chlorine (sodium dichlor or household calcium hypochlorite), follow manufacturer directions for correct dose – these products are commonly used by full-time RVers because they are easier to measure and store.
- If your RV has a water heater, follow manufacturer instructions to bypass and sanitize it, or sanitize it separately if required. CDC
Practical examples and calculations
Example 1 – 45 gallon tank:
- Ratio: 1/4 cup per 15 gallons -> for 45 gallons you need 3 x 1/4 cup = 3/4 cup bleach (6 oz).
- Fill tank with water, add bleach, circulate and soak 6-12 hours, flush until smell gone.
Example 2 – Full-time RVer with 100 gallon tank (spring and fall schedule):
- Many full-time RVers sanitize every 6 months; they may use stabilized chlorine at manufacturer doses or household bleach at higher concentration if they suspect contamination.
Filters, filtration options and what they remove
Choosing the right filters reduces contamination risk and improves taste. Here is a simple comparison table:
| Filter type | Removes | Pros | Cons | Typical replacement |
|---|---|---|---|---|
| Sediment filter (5 – 20 micron) | Sand, dirt, rust | Protects downstream filters and appliances | Does not remove bacteria | 3-6 months or sooner if clogged |
| Carbon block filter | Chlorine, taste/odor, some VOCs | Improves taste and odor | Not a bacteria barrier unless specified | 3-6 months |
| Ceramic filter | Bacteria, protozoa (some models) | Good for biological contaminants | Slower flow, needs cleaning | Clean regularly, replace per manufacturer |
| UV purifier | Bacteria, viruses, protozoa | Kills microbes without chemicals | Needs power and clear water (pre-filtration) | Lamp replacement annually |
| Reverse osmosis (RO) | Most dissolved solids | Produces very pure water | Wastes water, needs pressure, costly | Membrane 2-5 years |
Tip – use a sediment pre-filter before carbon or UV to improve lifespan and performance.
What to do when you hook up to unknown or suspect water (campground or well)
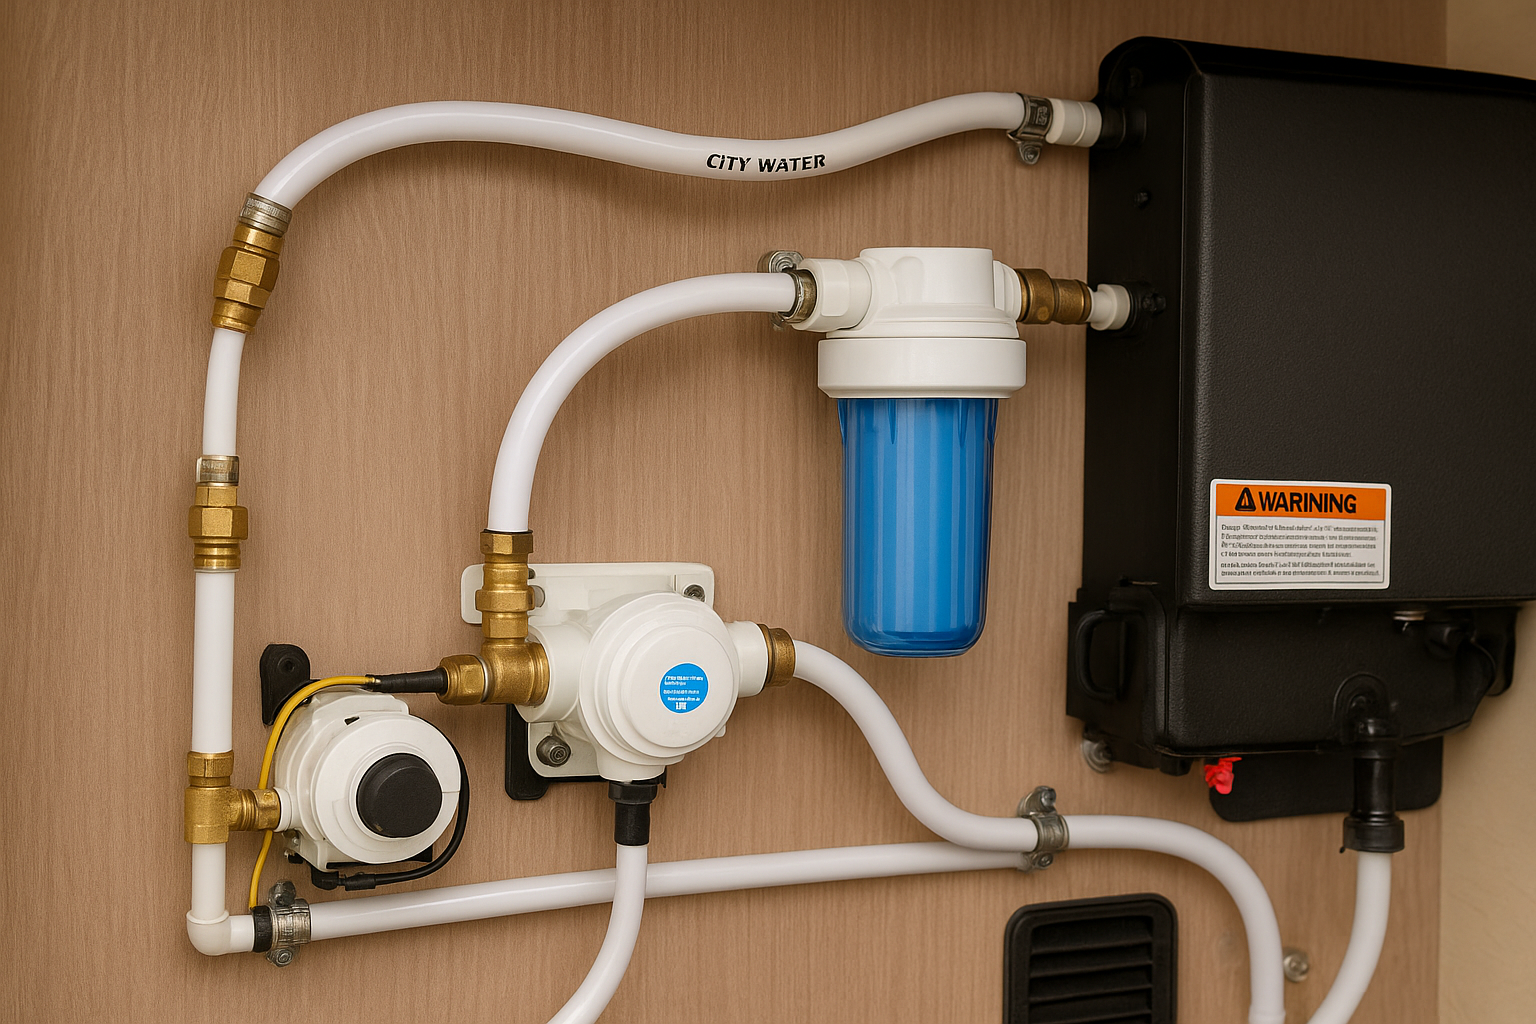
When you connect to city or campground “city water” inlet:
- Always use a good-quality, food-grade, potable water hose and a pressure regulator to prevent overpressure damage.
- If you are unsure about water quality (older campground systems, private well at a site), use an inline carbon filter or treat the water – either by boiling, filtering plus disinfection, or using bottled water for drinking.
- If you use campground connections frequently, sanitize your onboard tank and lines more often.
For private well sources:
- EPA and CDC data show private wells are more likely to have contaminants than public systems. Test water or use appropriate filtration/disinfection. EPA+1
Detecting problems early – taste, smell, and flow issues
Common warning signs:
- Chlorine or bleach odor after thorough flushing – may mean you did not rinse enough.
- Musty or sweet smell – can indicate bacterial or algae growth inside tank or lines.
- Cloudy water or sediment – likely need filter replacement and tank inspection.
- Reduced flow – clogged filters, kinked lines, failing pump, or scale in appliances.
Action steps: - If you detect bacterial smells or unusual taste, sanitize immediately and run the system. If symptoms persist, consider professional inspection or lab testing.
Data-driven reasons to be proactive
Relevant data:
- Public health guidance for RVs specifically recommends draining, disinfecting, and flushing at least once per year or after long storage. This is the minimum practice for protecting health. CDC
- For private water sources and wells, CDC/EPA materials note that a non-trivial percentage of private wells have contaminants above health standards – which is why unknown campsite sources should trigger extra caution. EPA+1
These data points show that regular maintenance is not just “best practice” – it is a health-focused, evidence-backed habit.
Winterizing, storing, and long-term storage tips
If you store your RV for months:
- Drain the fresh water tank and lines, or sanitize before storage to avoid stagnation.
- Some RVers leave a small chlorine residual if they plan to leave water in tank – but this requires careful monitoring and is not universally recommended. If you choose residual, flush thoroughly before drinking.
- For winterization: remove water from lines and use RV-rated antifreeze where needed – follow manufacturer instructions.
Quick troubleshooting cheat sheet
- Low water pressure: check city pressure regulator, inspect sediment filter, check for kinks, clean faucet aerator.
- Bad smell/taste: sanitize tank and lines, replace carbon filter, flush thoroughly.
- Discolored water: run until clear, replace filters, consider tank inspection.
- Water heater issues: drain and flush sediment, check anode rod and manufacturer guidance.
Best practices summary – weekly to yearly
- Before every trip: visual hose check, pressure regulator on city hookups.
- Monthly (if full-time or frequent use): inspect filters, check for taste/odor.
- Every 6-12 months: sanitize fresh water tank and lines (at least annually; many RVers do it twice a year).
- Annually: flush water heater, inspect plumbing for corrosion, replace crucial filters.
Comparison of sanitizers and when to use them
| Sanitizer | Good for | Pros | Cons |
|---|---|---|---|
| Household bleach (unscented) | Routine sanitizing | Cheap, widely available, effective | Must measure properly, rinse thoroughly |
| Sodium dichloro or calcium hypochlorite | Heavy duty, concentrated | Stable, compact, good for storage | Needs careful dosing, manufacturer directions required |
| Commercial RV sanitizers | Ease-of-use | Designed for RVs, convenient | More expensive |
| UV + pre-filtration | Onsite continuous disinfection | Chemical-free, effective vs microbes | Needs power, clear water, and upfront cost |
H2 – Final notes – common mistakes to avoid
- Using a regular garden hose – instead use a NSF/ANSI certified potable water hose for drinking water.
- Skipping the pressure regulator on city hookups – high pressure can damage plumbing.
- Leaving tanks full and unused for long periods without treatment – leads to stagnation and biofilm.
- Using scented or splashless bleach – those may contain additives not safe for potable water. Always use unscented household bleach or products labeled safe for drinking water sanitation.
Closing – Keep it simple, keep it scheduled
Keeping your RV water system in perfect condition is about a few regular steps:
- Inspect hoses and fittings, use the right hose and regulator, change filters as needed, and sanitize at least once a year (or more often if you store or use suspect water). Follow manufacturer instructions for appliances and heaters, and use reputable filters and sanitizers when needed. The CDC and RV industry resources recommend annual disinfection and more frequent care for heavy users.
Sources and Further Reading
🛠️ Escapees RV Club: Practical Guides for RV Water System Maintenance
Escapees RV Club provides hands-on, practical guides to help keep your RV water system in top condition. Their resources include:
- Sanitizing the Fresh Water Tank: Step-by-step instructions on cleaning and disinfecting your fresh water tank, including recommended frequency (at least twice a year or after long storage) and proper bleach dosing.
- Water Filters: Guidance on choosing the right filters, when to replace them, and how they improve water quality.
- Dewinterizing Plumbing Systems: Instructions for removing antifreeze, refilling the system, and checking for leaks.
- Mobile RV Mechanics: Tips on when to contact mobile RV plumbing experts for complex issues.
🧰 RV Life: Tools and Resources for RV Maintenance
RV Life offers tools and resources that help RVers manage maintenance schedules, including the water system:
- RV Maintenance Management: Set up maintenance reminders for cleaning and sanitizing your RV water system.
- Water Filters Explained: Detailed explanations of filter types, benefits, and how they ensure safe drinking water.
- Dewinterizing Plumbing Systems: Step-by-step guidance for removing antifreeze, flushing lines, and checking system integrity.
- Alternative Sanitizing Products: Information on chlorine-free disinfectants like TankFRESH for eco-friendly water system sanitization.
🌿 Harvest Hosts: Unique RV Experiences with Safe Water Access
Harvest Hosts provides unique RV locations with access to quality water sources, ideal for safe and enjoyable RVing:
- Access to Unique Locations: Stay at farms, wineries, and museums that offer potable water connections.
- Safe Water Practices: Ensures high standards for water quality and safety for your RV system.
- Community and Support: Tips and recommendations from fellow RVers on water system maintenance and hookup locations.