Route Planning Mastery: The Essential 2025 Guide to RV-Safe Navigation
Introduction: The True Cost of a Miscalculated Mile
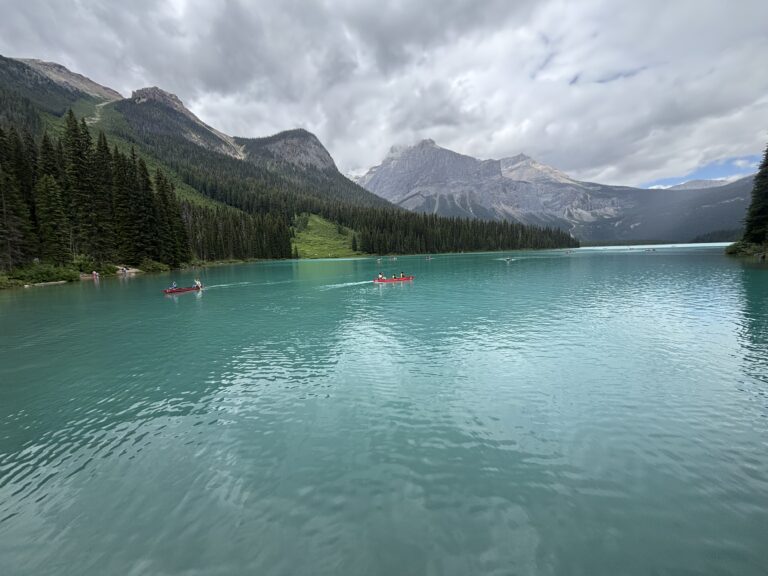
The open road is the ultimate symbol of freedom, and for millions of adventurers, the Recreational Vehicle (RV) is the key to unlocking that freedom. However, the sheer size and weight of a motorhome or travel trailer turn standard navigation into a high-stakes engineering challenge. A simple GPS error can lead to a disastrous, costly, and even life-threatening encounter with a low bridge, a weight-restricted span, or a terrifyingly narrow mountain pass.
Statistics from transportation safety agencies show that RV-related incidents, often involving structural collisions or loss of control due to unsuitable road conditions, are a persistent safety concern. Misjudging an overpass or ignoring a posted bridge weight limit can result in tens of thousands of dollars in damage, legal liability, and prolonged – sometimes permanent – disruption to your journey.
This comprehensive guide is your master class in Route Planning Mastery. We move beyond the basic mapping apps and dive deep into the professional strategies, critical measurements, regulatory knowledge, and specialized tools required to plot an RV-Safe Route every single time. By the end of this article, you will possess the expert knowledge to transform your route planning from a hopeful guess into a precise, professional operation, safeguarding your investment and, most importantly, your family’s safety. Welcome to the elite level of RV navigation.
Phase I: The Foundational Science of Your Rig
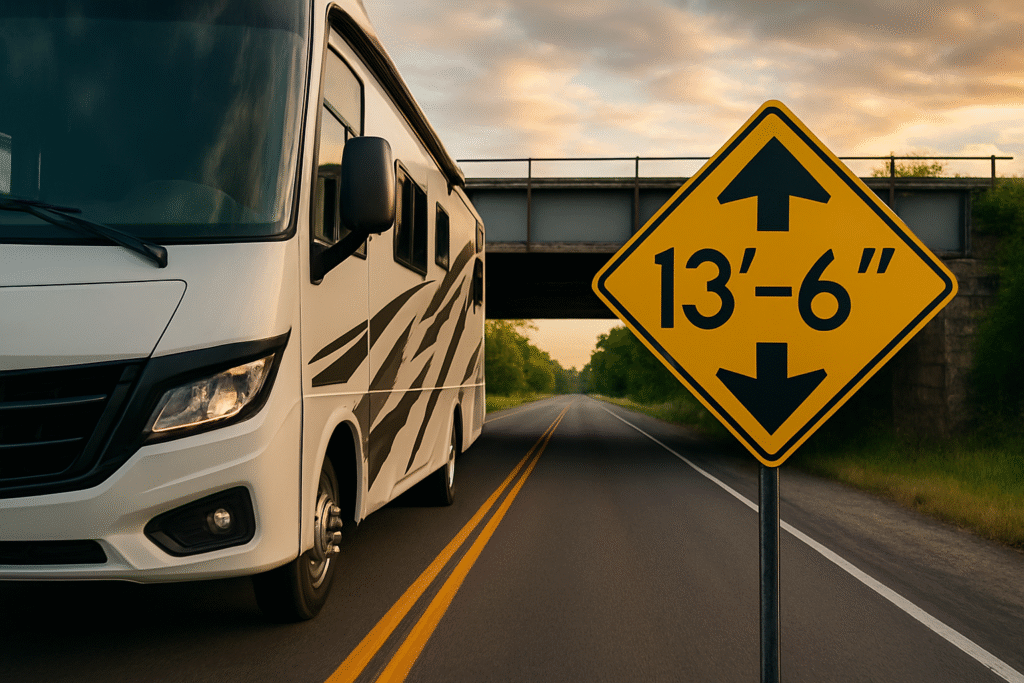
The journey to safe RV travel begins not with a map, but with a tape measure. Knowing your numbers is the single most critical step in avoiding low bridge clearance issues. Relying on manufacturer specs can easily lead to disastrous results. After measuring height, you must next verify your Gross Vehicle Weight Rating (GVWR)
1. Precision Measurement: Knowing Your Numbers
This is the single most critical step in avoiding low bridge clearance issues.
- True Height: Measure from the ground to the very highest point of your RV. This must include all rooftop additions: air conditioning units, satellite dishes, solar panels, and roof vents. Even a millimeter of inaccuracy can spell disaster.
- Pro Tip: For an added safety margin, many expert RVers recommend adding at least 6 inches to your measured height to account for uneven roads, subtle road crown variations, and the potential for a lost clearance when a road is repaved underneath a bridge without the sign being updated.
- Gross Vehicle Weight Rating (GVWR) & Axle Weights: Knowing your weight is essential for avoiding weight restrictions on bridges, overpasses, and older rural roads.1 This requires a trip to a certified public scale (like a CAT Scale, often found at truck stops).
- Fully Loaded Weight: Weigh your RV with all passengers, gear, full water tanks, and a full fuel tank. Compare this to your manufacturer’s GVWR. Never exceed this number.
- Axle Weight Distribution: Ensure your weight is balanced. Improper loading can affect braking, handling, and stability, turning a winding road into a hazard.
- Length and Width: These are crucial for navigating tight turns, historical city centers, and designated narrow roads or national park loops. Note your overall length, including any towed vehicle (the “toad” or trailer).
2. The Legal and Practical Buffer Zone
Federal guidelines generally establish interstate bridge clearances between 14 to 16 feet, but state, county, and local roads – especially in older, historic regions – can be significantly lower. Weight restrictions also vary wildly, often posted as “posted legal load limits” that are much lower than the actual design capacity due to age, poor condition, or material type (e.g., wooden bridges). Your route must be planned with a conservative buffer built into all three dimensions: height, weight, and turn radius.
Phase II: The Technology Stack for Safe Routing
Standard consumer GPS tools like Google Maps or Apple Maps are entirely insufficient and inherently dangerous for RV travel, as they prioritize the shortest or fastest path without accounting for vehicle dimensions. Route planning mastery demands purpose-built technology.
1. Dedicated RV-Specific GPS Devices
These physical units are the gold standard for many, as they operate independently of cellular service and are designed with one job: safe RV navigation.
| Feature | Importance for RV Safety |
| Custom Vehicle Profile | Allows input of your RV’s exact height, weight, length, and even propane restrictions. The system then automatically excludes thousands of unsuitable roads and clearances. |
| Offline Mapping | Essential for navigating remote areas, National Forests, and rugged terrain where cell service is non-existent. |
| Predictive Alerts | Provides early verbal and visual warnings for upcoming hazards like steep grades, tight turns, or low clearances, allowing ample time for safe maneuvering or detouring. |
| POI Database | Includes pre-loaded, categorized Points of Interest specifically for RVers: campgrounds, dump stations, travel centers, and propane fill-up spots. |
| Traffic Integration | Real-time traffic data, where available, helps avoid getting stuck in urban congestion, which can be difficult to navigate in a large vehicle. |
| Advanced Lane Guidance | Crucial for making safe, wide turns at complex intersections, ensuring you don’t ‘clip’ curbs or other vehicles. |
Examples include devices from Garmin’s RV and dezl lines or Rand McNally’s TND series.
2. Specialized RV Navigation Apps and Software
For tech-savvy travelers, a subscription to a dedicated RV routing platform is an indispensable planning tool. These often leverage massive, user-validated databases that far exceed the scope of traditional GPS data.
- RV LIFE Pro (formerly RV Trip Wizard and RV LIFE GPS): This is a powerful, web-based planning suite that syncs with an in-app GPS. Its core value is the “RV-Safe Route” algorithm, which analyzes your vehicle’s profile against millions of data points, including user-reported hazards and problem spots. It is renowned for its steep grade warnings and detailed campground reviews specific to large-rig access. RV LIFE Pro
- CoPilot GPS: A robust navigation app that calculates routes based on your vehicle’s dimensions, focusing on avoiding low bridges, truck-restricted tunnels (due to propane), and weight-limited highways. It is one of the few that offers reliable offline maps.
- Roadtrippers (Premium): While less focused on the purely functional navigation of a CoPilot or RV LIFE, the premium tier offers customized routing based on vehicle dimensions, making it a powerful planning tool for finding scenic, yet safe, byways. Roadtrippers
The Hybrid Approach to Route Planning: The master route planner utilizes both technology layers. The app/software is for pre-trip planning – scouting the entire route, identifying problem spots, and confirming alternative options. The dedicated GPS or app then serves as the in-cab navigator, providing real-time, turn-by-turn instruction and hazard warnings. Never rely on one tool alone.
Phase III: Avoiding the Three Great Road Hazards
True mastery lies in the granular strategies for circumventing the three primary threats to a large vehicle.
1. Low Bridges and Clearance Obstacles
Collisions with low-clearance structures are the most common and expensive RV accidents.
- Understand Repaving Risk: As noted, road repaving can incrementally reduce clearance height by inches without a corresponding sign change. Always assume less clearance than posted.
- Parkways and Historic Roads: Many US states (e.g., New York, New Jersey) have historic parkways explicitly banned to commercial vehicles and RVs due to extremely low clearances (sometimes less than 10 feet). These roads are designed for passenger cars only and must be scrupulously avoided.
- Non-Bridge Obstacles: Low-hanging power lines, tree limbs (especially in private campgrounds or older rural areas), gas station canopies, and drive-through awnings are often overlooked clearance hazards. Your co-pilot should visually confirm clearance before entering any tight area off the main road.
2. Narrow Roads and Tight Turns
Requiring complex maneuvers, narrow roads may not be officially posted but frequently lead to frightening and unsafe situation
- Use Satellite View: During the planning phase, use the satellite imagery feature on your app or browser (Google Maps, Bing Maps, or the RV LIFE tool) to visually inspect key junctions, city approaches, and campground entrances. Look for sharp, unmarked turns and the width of the shoulder.
- The ‘Truck Route’ Rule: Generally, if a road is designated as a truck route, it is built to handle the width and turning radius of an 18-wheeler, making it inherently safer for your RV. Stick to these routes whenever possible.
- Turning Practice: An RV’s steering axis is ahead of its rear wheels, meaning the rear wheels track inside the path of the front wheels. When turning, you must pull well past the intersection before initiating the turn to ensure the rear of your RV or towed vehicle clears the curb and sidewalk.
3. Weight Restrictions and Load Limits
Structural weight limitations are a serious safety and legal issue.
- Temporary vs. Permanent Restrictions: Seasonal limits (often due to thawing or heavy rain) are usually temporary. Permanent limits are tied to the structural integrity of the bridge. RV-specific GPS systems are generally better at tracking these temporary changes, which commercial truck databases update regularly.
- Posted Limits: Weight limits are posted as a maximum tonnage. Always check the sign and compare it to your fully loaded GVWR. If the sign is unclear, assume the restriction applies to you and find an alternative route.
- Axle Weight: Some signs will post limits not just on Gross Weight, but also on per-axle weight. Overloaded axles—common with poor RV loading—can violate this restriction even if your total weight is under the gross limit. Professional weighing is essential to know your true axle loads.
Phase IV: The Power of a Master Problem-Spot Database
The most elite route planners do not rely solely on official data; they leverage a continuously updated, crowd-sourced, and professionally validated compilation of known hazards – a Master Problem-Spot Database. While this specific database is “secret,” its functionality is built on the same principles used by the leading commercial RV and trucking navigation platforms.
1. Anatomy of the Problem-Spot Data
This specialized data goes beyond simple road signs and clearance markers. It catalogs the specific, often hyper-local, issues that lead to RV accidents and detours.
| Problem-Spot Category | Data Point Collected | Real-World Example |
| Low Clearance | Exact, current height; directional warning (e.g., “only an issue traveling Eastbound”); date of last verification. | The infamous 11’ 8” “Can Opener” bridge (now 12’ 4”) in Durham, NC, which was perpetually struck by trucks ignored basic signs. |
| Weight Restriction | Posted limit (tons); type of structure (e.g., historic truss bridge); typical route alternative. | A scenic county road bridge over a creek with a 5-ton limit, often missed because it’s only posted on a small sign at the turnoff. |
| Narrow/Winding Roads | Max width (feet); percentage of grade (steepness); severity of switchbacks (hairpins); maximum length of vehicle suggested. | US-Highway 129 (“The Tail of the Dragon”) or sections of California’s Highway 1, scenic but impassable for large RVs. |
| Logistical Hazards | Difficult fueling access; confusing, tight campground entry points; known low-hanging tree branches in a specific town. | A gas station whose canopy is 13’ 0” high but has a steep approach/exit, effectively reducing clearance to 12’ 6”. |
2. The Validation and Community Layer
The true value of a master database is its accuracy and timeliness. Unlike static map data, these systems are living, breathing entities.
- Crowd-Sourced Intelligence: Thousands of commercial drivers and dedicated RVers act as the first line of defense. They report new, temporary, or missing restrictions via dedicated apps. This real-time feedback loop is essential for catching recently fallen branches, new construction detours, or temporary weight limits imposed after weather events.
- Professional Validation: Before an alert is pushed to all users, a dedicated team cross-references the crowd-sourced report against official state DOT records, satellite imagery, and municipal codes. This ensures the data is both fresh and reliable, minimizing false positives.
- Directional Accuracy: A sophisticated system tracks low clearances not just by location, but by direction of travel. A bridge over a highway may be low, but only for the on-ramp or a specific lane, allowing the RV to safely pass underneath while staying on the main highway. A master database provides this granular, directional data, which is a major time-saver.
3. Leveraging the Database for Planning
Your goal is to use this database (or the commercial equivalent you subscribe to) to plot the route before you leave.
- Overlay the Hazard: Use the software to input your specific RV profile and plot your desired path.
- Analyze the Conflict: The system will immediately flag any conflict points (low bridges, tight turns, weight limits).
- Plot the Alternative: Do not simply ignore the warning. Use the tool’s alternate route suggestions or manually plot a verifiable detour, again using satellite view to confirm the new path is safe.
- Save the Master Plan: Lock in your preferred, conflict-free route to your in-cab GPS.
Phase V: The Expert RVer’s Driving Protocol
Even the perfect route requires a disciplined driver. Route planning mastery extends to the cockpit.
- The ‘3-3-3’ Rule: A common best practice for new and veteran RVers.
- 300 Miles: Limit daily travel to no more than 300 miles.12
- 3 PM: Arrive at your destination by 3:00 PM, giving you time to set up camp in daylight.
- 3 Days: Stay for a minimum of three nights. This pace ensures you are rested and alert.
- Height Sticker: Affix a large, brightly colored sticker with your RV’s exact, total clearance height (e.g., 13′ 4″) to your dashboard, directly in your line of sight. Never, ever rely on memory.
- The Slow Approach: When approaching any structure that looks low, or if a clearance sign seems close to your height, slow to a crawl. The slow speed minimizes damage if a strike occurs and provides time for a last-second, safe stop and visual verification.
- Co-Pilot Responsibility: Designate your co-pilot as the “Navigation and Clearance Officer.” Their sole job near urban areas, junctions, or potential hazards is to cross-reference the GPS against road signs, visually confirm clearances, and communicate clearly.
Conclusion: Driving with Confidence
Route Planning Mastery is the ultimate defense against the hidden dangers of the open road. It is a commitment to precision, diligence, and the application of specialized knowledge and tools. By adopting the principles of detailed measurement, investing in RV-specific navigation, understanding the threats of low clearance, and utilizing the power of a comprehensive problem-spot database, you move beyond the risks faced by the average traveler. You are not just a driver; you are a professional navigator, ensuring every mile of your adventure is safe, predictable, and stress-free. Drive with knowledge. Drive with confidence. Drive safe.